We can create our own button in customer control panel using the class action. This button also like ‘Upgrade’,’Uninstall’ buttons.
Follow the below steps to create action button
—————————————————-
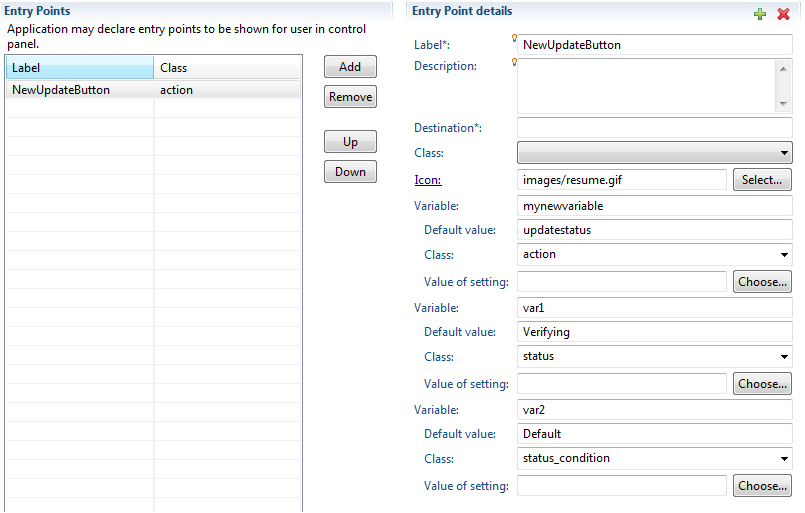
In Eclipse go to Entry Points Tab
1. Label -> NewUpdateButton
2. Description-> Keep it as blank (optiional)
3. Destination-> Keep it as blank (optional)
4. Class-> keep it as blank
5. Icon-> Image file from the images folder- images/resume.gif.
6.Variable-> mynewvariable( this will be settings variable)
7.Defaultvalue->updatestatus
8.Class->Action
9.value of settings-> keep it as blank
10. variable->var1
11.Default value->verifying
12.Class->status
13. value of settings->keep it as blank
14.variable->var2
15. Default value->Default
16. Class-status_condition
17. Value of settings->keep it as blank
Above settings will be view as in the source section of eclipse as below
————————————————————-
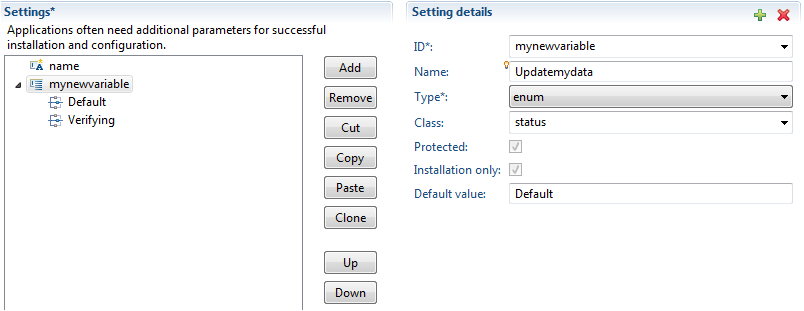
Go to the settings tab of the same service.do the following variables adding.means create an enum fields with choice fields
1. ID->mynewvariable
2. Name->Updatemydata
3. Type->enum
4. Class->status
5. Protected-make as checked
6. Installation only->make as checked
7. default value->Default Value
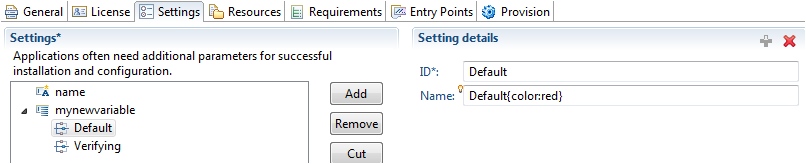
In the choice field add below two items
ID->Default
Name->Default{color:red}
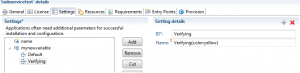
ID->Verifying
Name->Verifying{color:yellow}
Above settings will be view as in the source section of eclipse as below